QuickUI ProductShow
A professional interactive product presentation template built for Unreal Engine 5, powered by the QuickUI Plugin and QuickUIDesign UI framework.
Create Stunning Product Experiences with Simple Configuration
Designed for product visualization, home furnishing showcases, digital exhibitions, and interactive demonstrations, QuickUI ProductShow enables designers and developers to quickly create immersive, dynamic, and visually engaging product experiences without the complexity of traditional UMG interface development.
With an intuitive configuration-based workflow, you can transform static product presentations into interactive experiences featuring animations, information panels, material switching, camera transitions, and real-time visual feedback.
Demo & Example Project: Download here
Project Structure
Core Concepts
Refer to the diagram below for the data flow:
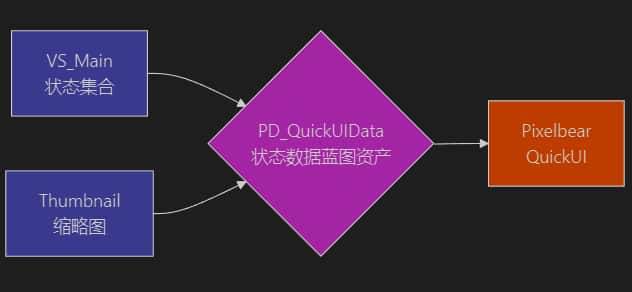
VariantSet (State Collection)
Corresponding file: /PixelBear/ProductAssets/Levels/VS_Main.uasset
(Only associated with the specific level)
Note: Unreal Engine's VariantSet manages interaction states and is the key to automatic UI configuration in this template.
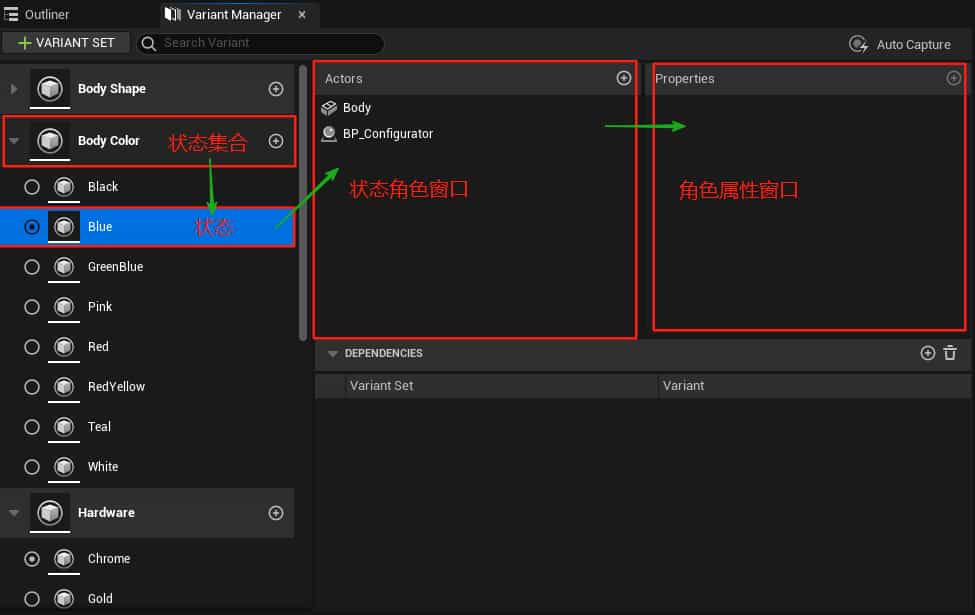
As shown above:
- State Collection: Corresponds to the top-level menu on the UI.
- State: The smallest unit within a state collection, corresponding to specific function items under the secondary menu.
- State Actor Window: Used to add and manage actors belonging to a specific state.
- Actor Property Window: Used to add and manage properties of actors within a specific state.
The user interaction flow is as follows: clicking on different states triggers changes to the properties of various actors in the scene.
Thumbnail
Corresponding file: /PixelBear/ProductConfig/DateAssets/PD_QuickUIData.uasset
(This file corresponds to one interactive application only)
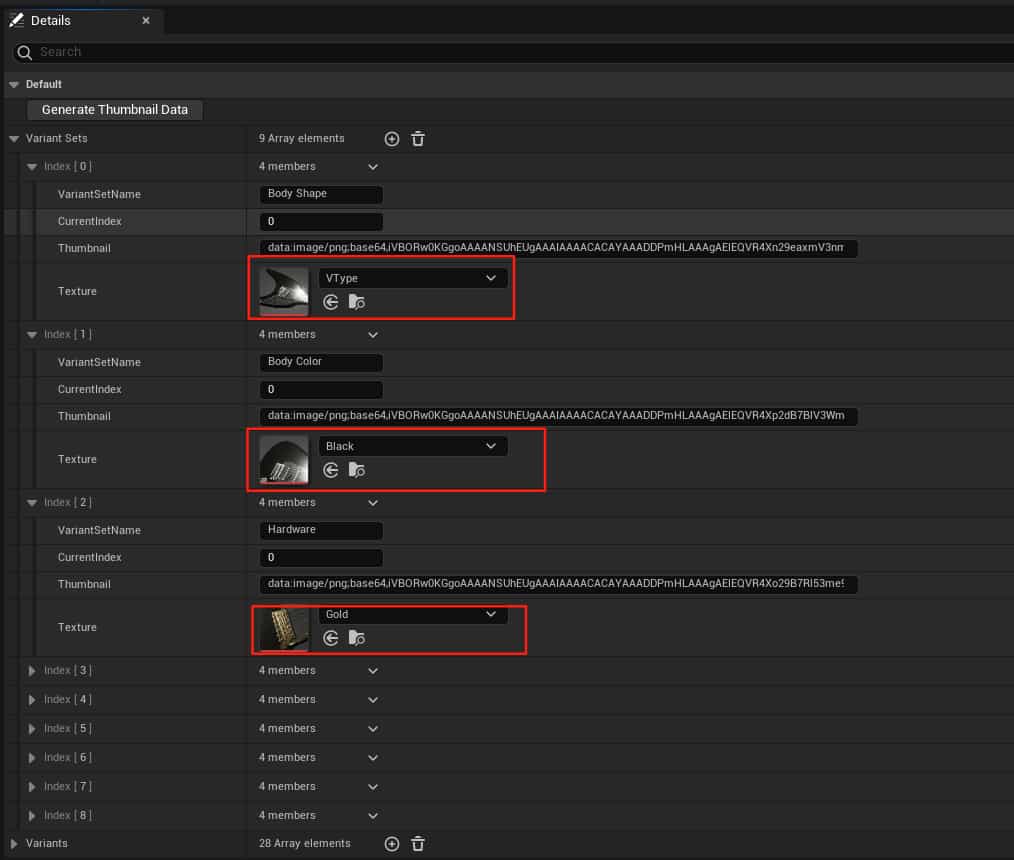
As shown above: Users customize icon data for top-level and secondary menus by configuring the PD_QuickUIData asset.
Quick Start
-
Create a Basic level
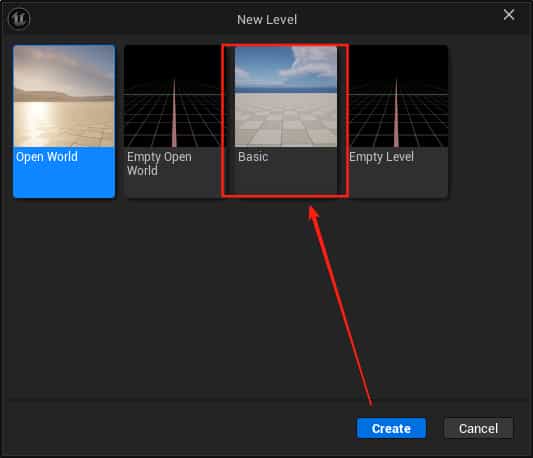
-
Drag
/PixelBear/ProductConfig/Blueprints/BP_Configurator.uassetinto the level. -
In the level's World Outliner, select
BP_Configuratorand create the correspondingLevel VariantSetsasset as shown below. (Refer to the video tutorial for details on Level VariantSets.)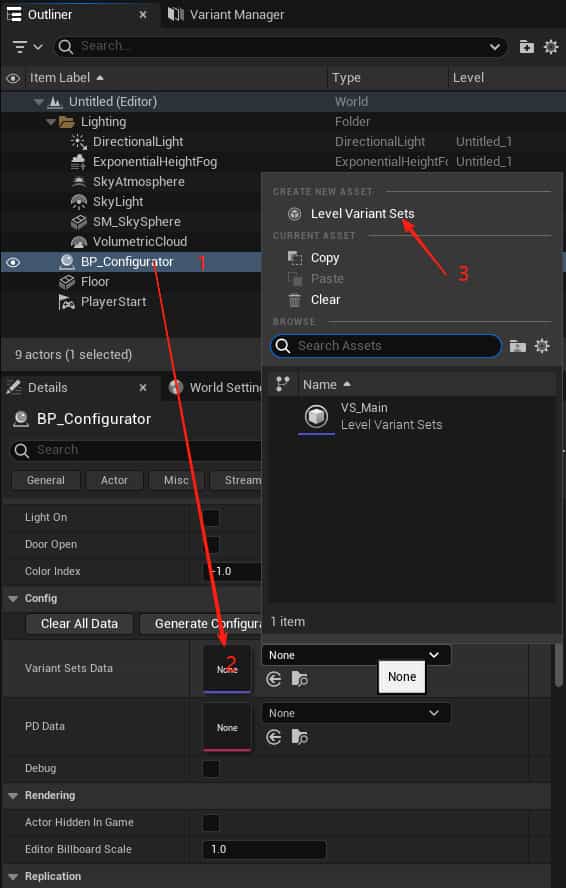
-
Duplicate
/Content/PixelBear/ProductConfig/DateAssets/PD_QuickUIData.uassetand open it as shown: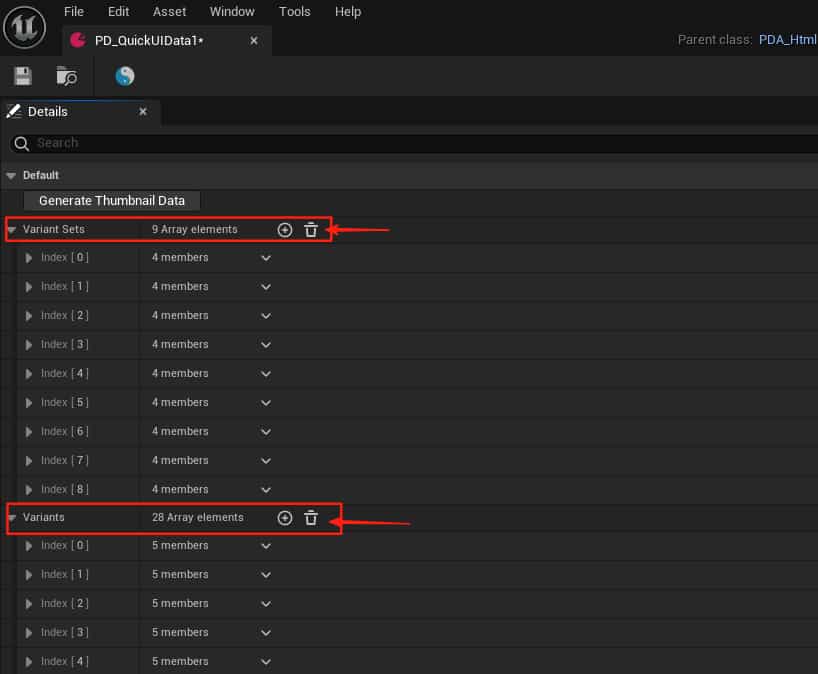
In the corresponding
VariantSetsandVariantsdata sections, click the "Clear" button, then click "Save". -
Back in the World Outliner, select
BP_Configuratorand configure it as shown: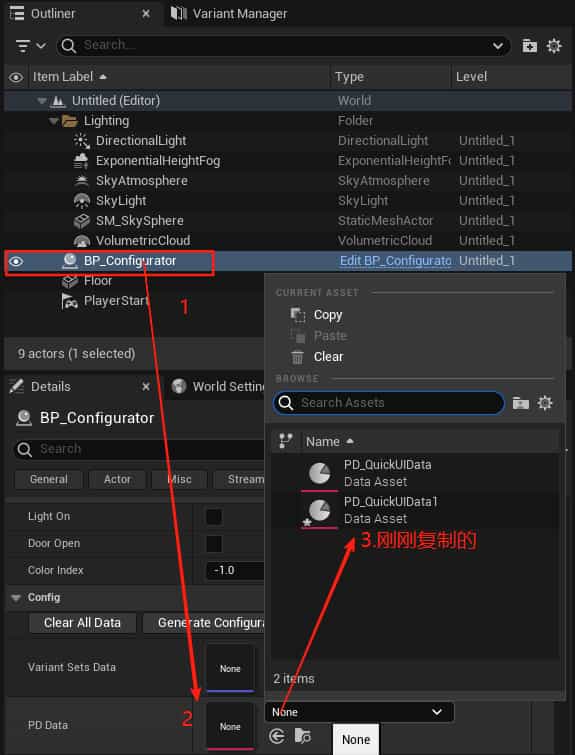
-
Open the VariantSets asset. Ensure the configuration is correct as shown below, then click "Generate Configuration Data".
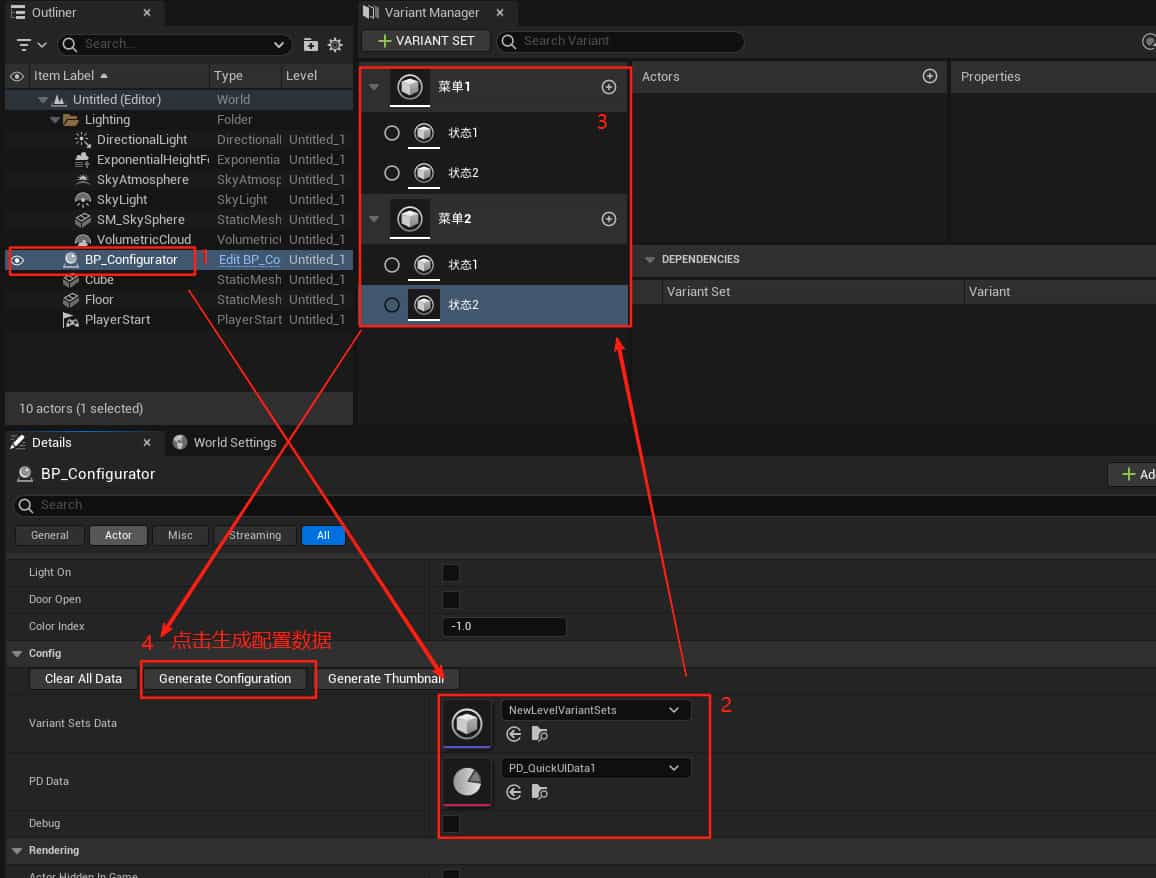
-
Check the
PD_QuickUIData1.uasset(the asset duplicated in step 4):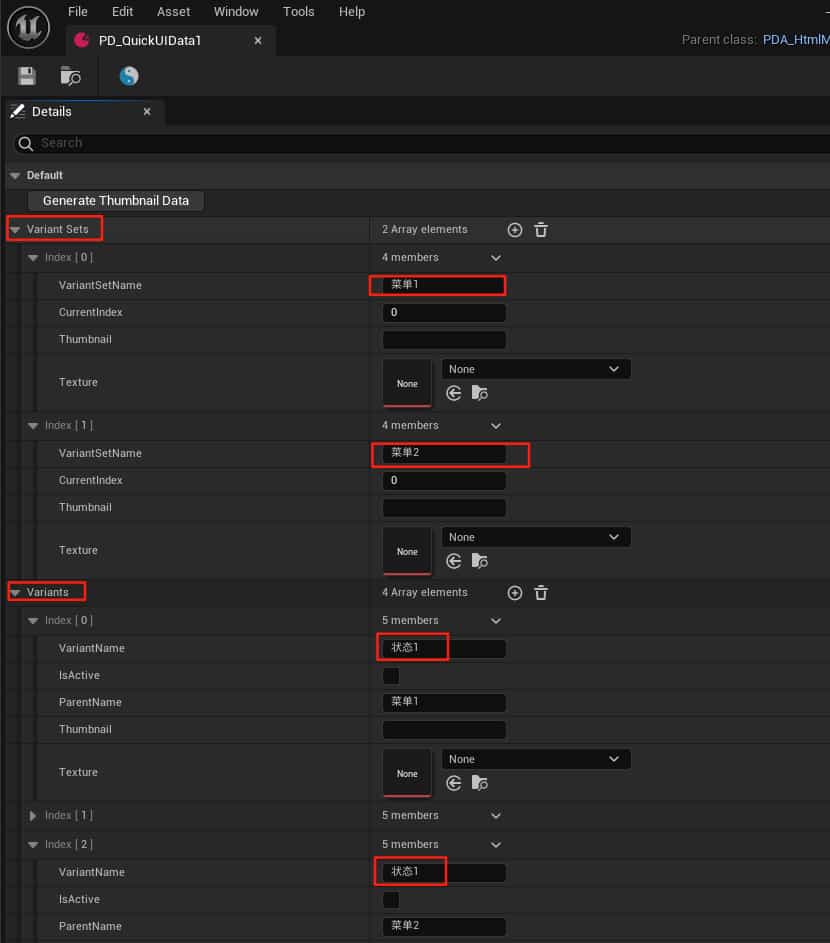
You will see that the menu names and state names have been generated based on the VariantSets. Some fields may be empty. Here is an explanation of each field:
- VariantSets:
VariantSetName: The top-level menu name (auto-generated).Thumbnail: Thumbnail data (auto-generated).Texture: Thumbnail texture reference (user-specified).
- Variants:
VariantsName: The state name, i.e., the UI name corresponding to a specific interaction function (auto-generated).IsActive: Typically check the first state of each menu so the UI recognizes it as the default state (user-specified).ParentName: The top-level menu to which the current state belongs (auto-generated).Thumbnail: Thumbnail data (auto-generated).Texture: Thumbnail texture reference (user-specified).
- VariantSets:
-
After configuration, click "Generate Thumbnail Data" to complete the thumbnail generation.
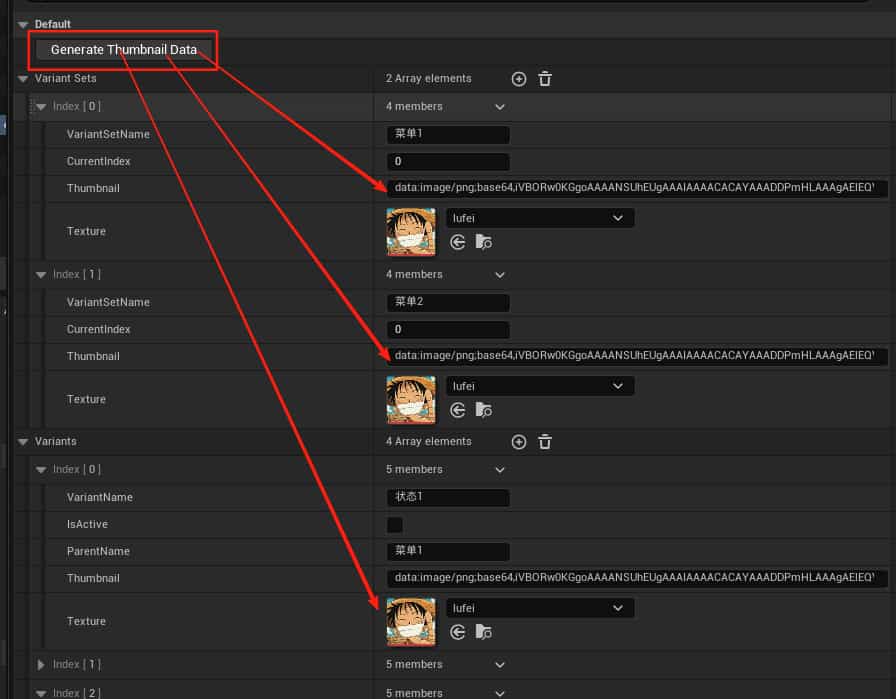
-
Finally, open the "World Settings" panel (Editor top menu: Window => World Settings) and set
BP_ConfigGameModeas the level's game mode.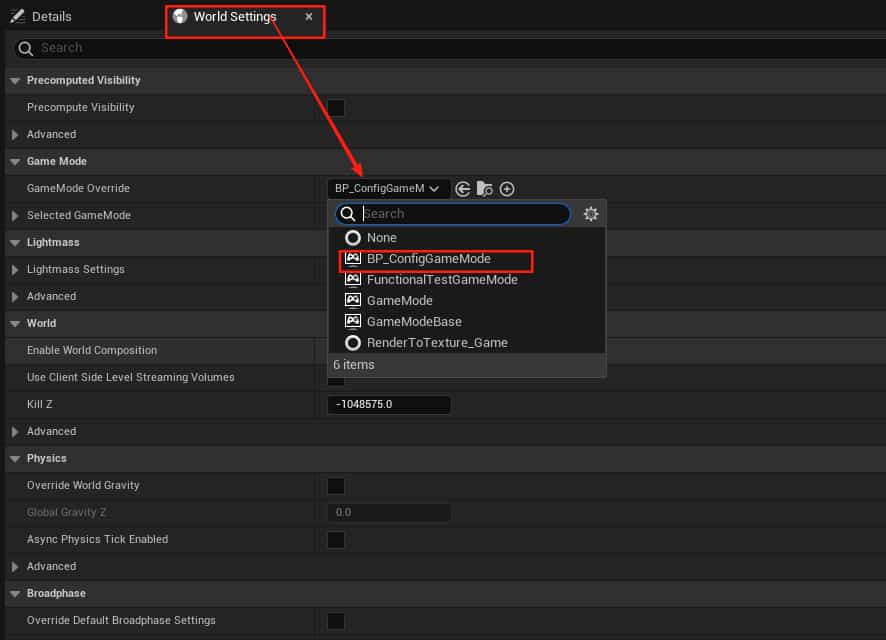
-
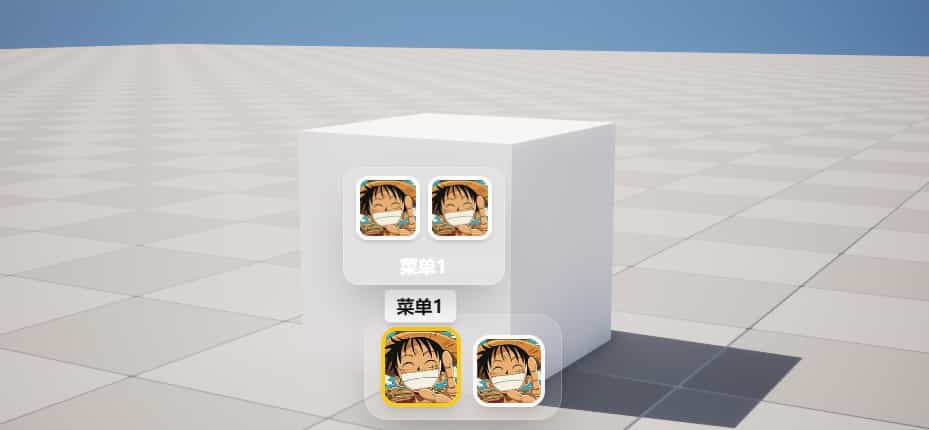
Click "Run". The template configuration is complete and the basic interactive UI is now set up. From here, you can refine the specific functions and property settings for each state within the VariantSet framework.
How to Bind Camera Hotspots?
-
Create Hotspot States
- Hidden state mode — State collections prefixed with
"__"will not be displayed in the menu.
- Hidden state mode — State collections prefixed with
-
Place Hotspots
- Use the
BP_HotPointblueprint atPixelBear/ProductConfig/Blueprints/Tools/BP_HotPoint.uasset. - Refer to the
BP_HotPointparameter documentation for details.
- Use the
-
Link Hotspot States
- Refer to the custom variable registration guide.
- Fill in the
HotPointChange_Intproperty. - Use dependency mode to associate it with other states.