Quick Start
This guide walks you through the complete workflow of using the QuickUI UE5 Plugin together with the QuickUIDesign template to build interactive UE5 interfaces with React.
Workflow Overview
Step 1: Install the QuickUI Plugin in UE5
Download the Plugin
Download the QuickUI plugin package for your UE5 version from QuickUI Plugin on Fab.com.
Install to UE5 Project
Download the plugin from the marketplace, which will automatically copy the plugin folder to the Plugins/ directory of your UE5 project.
If you need to install the QuickUI plugin in a different plugin directory, copy the QuickUI plugin folder to the Plugins/ directory of your UE5 project:
Enable the Plugin
- Open your UE5 project
- Go to Edit → Plugins
- Search for "QuickUI"
- Check the Enabled checkbox
- Restart the UE5 editor when prompted
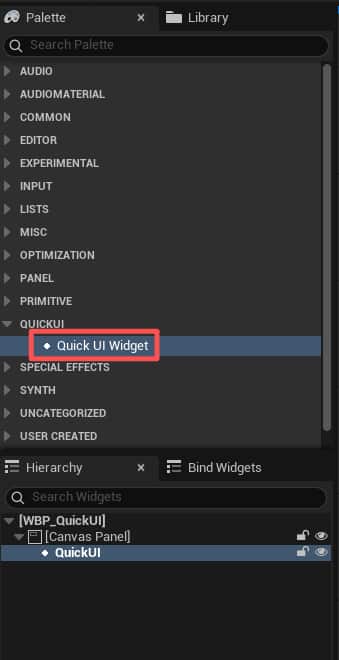
Add QuickUI Widget
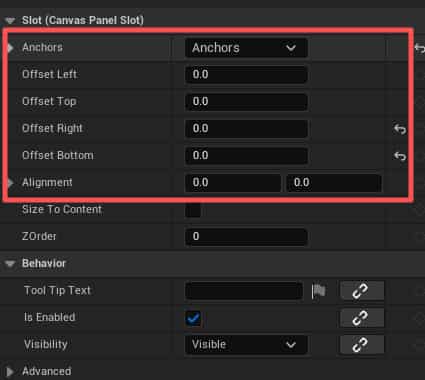
In the UMG blueprint, you should be able to see the QuickUI widget. Add it to the UMG and ensure it is mounted using a Canvas component, filling the entire UMG area:
Blueprint Configuration
A complete QuickUI blueprint configuration workflow is shown below:
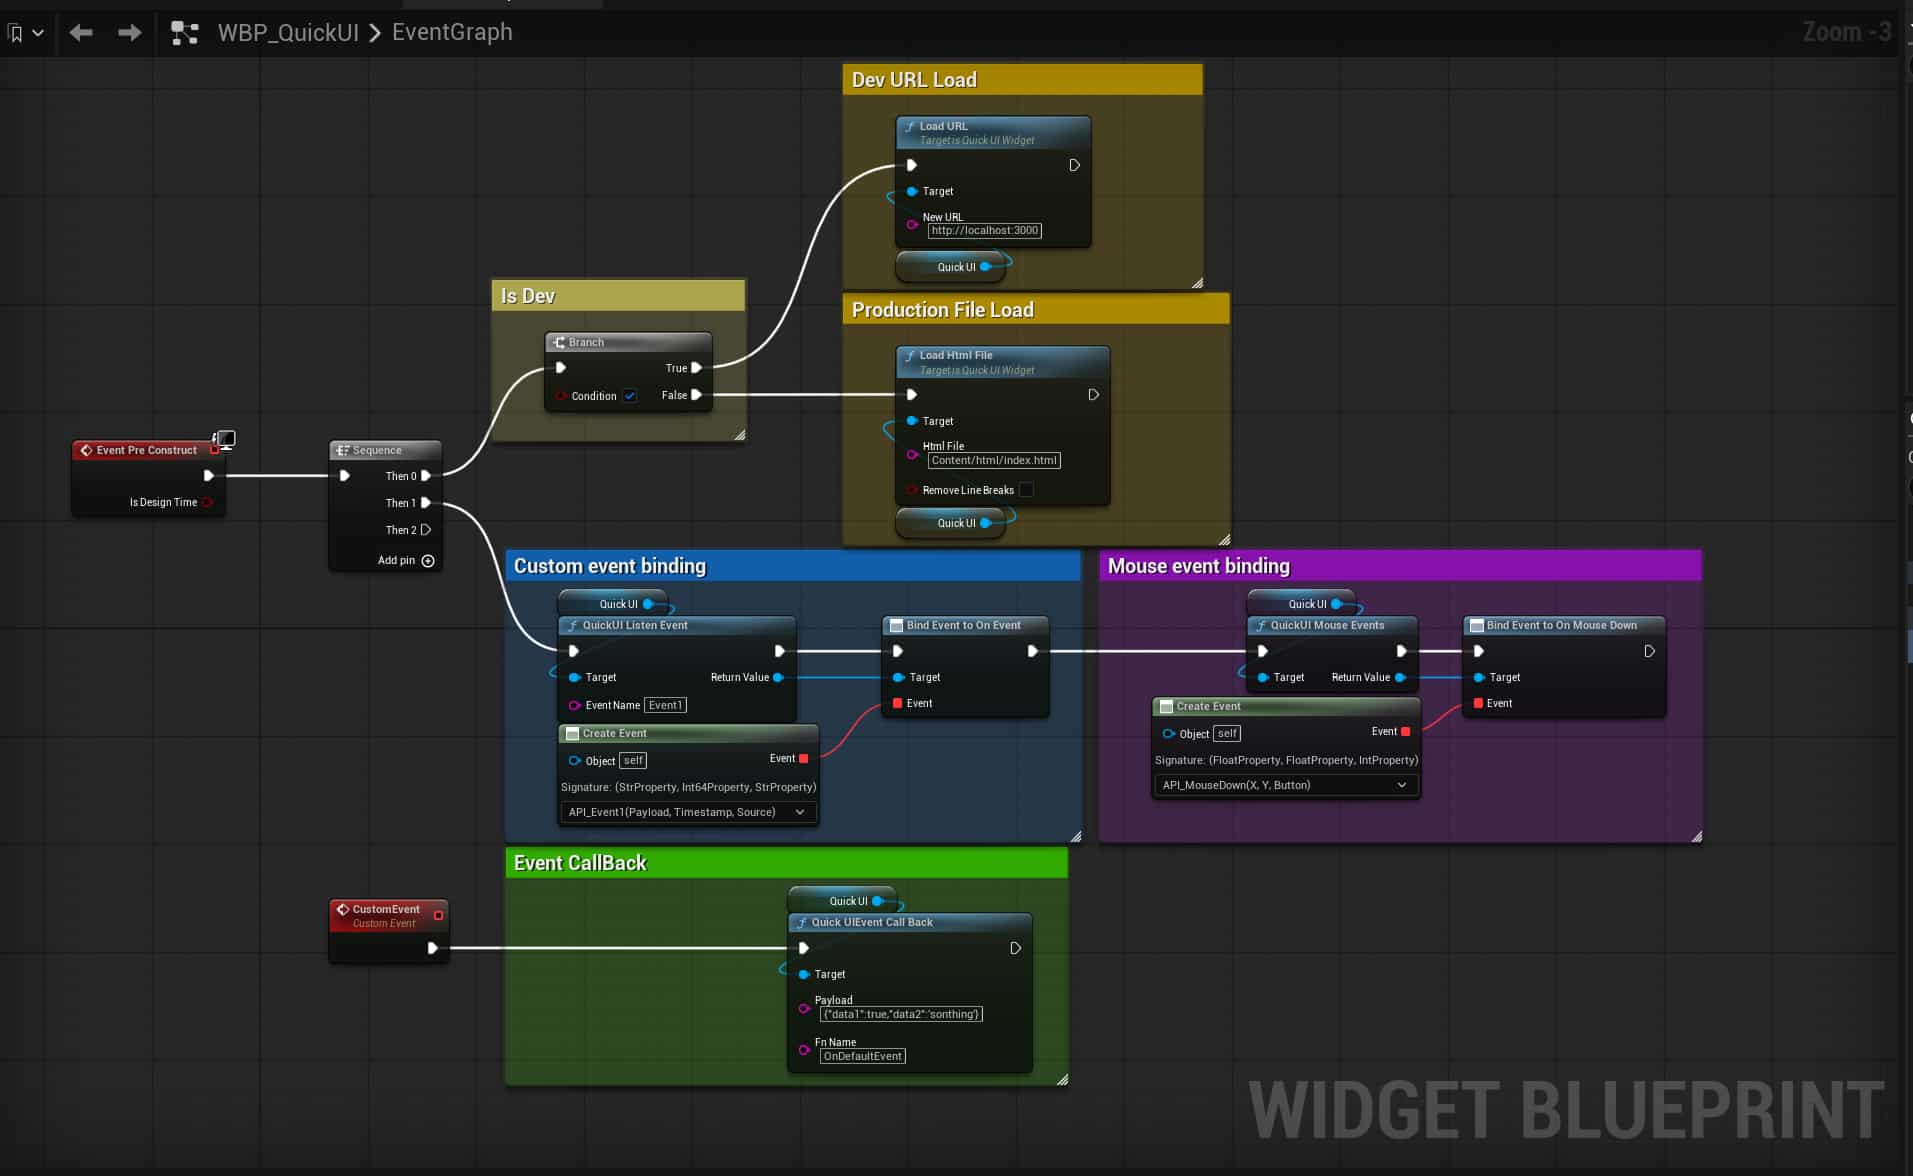
In the UMG blueprint, configuring QuickUI mainly involves three steps:
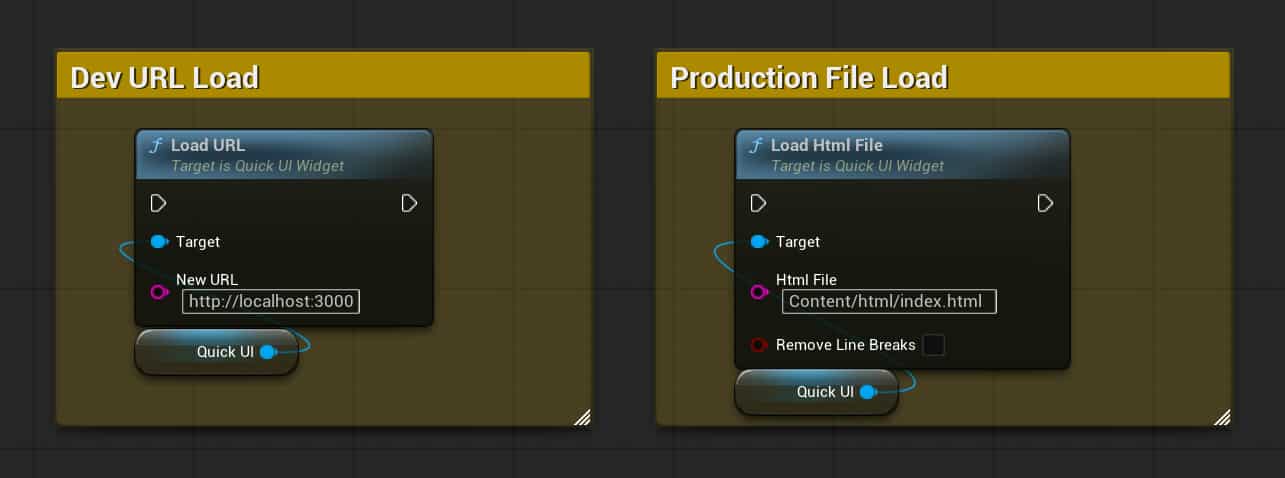
Load QuickUI File:
- In development mode, load the development URL address,
- In production mode, load the production HTML address.
UE5 Custom Event Registration and Binding:
- Custom Backend Event registration and binding,
Event Nameis the event name (needs to match the event name in the React component).
The image below shows a complete binding workflow (register -> bind -> callback):
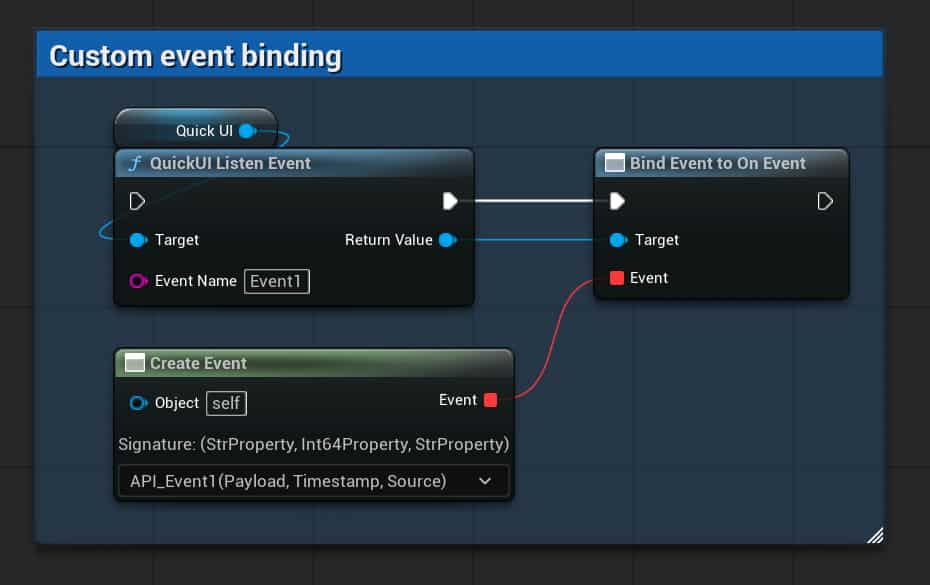
The
Event1registered in the image, if it matchesEvent1in the React component, then UE5 as the backend will receive the event parameters from the React component.
Mouse event registration and binding, such as MouseDown, MouseUp, MouseWheel.
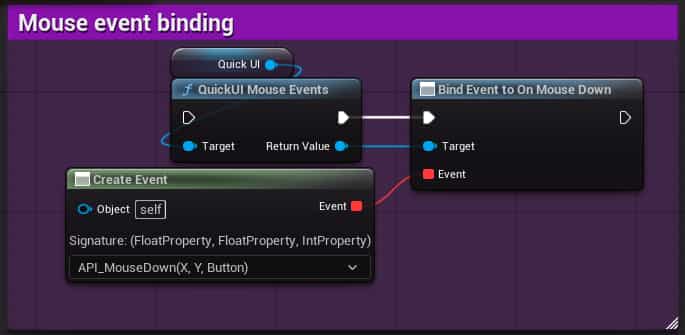

Note:
MouseDown,MouseUp, andMouseWheelevents are independent and need to be registered and bound separately.
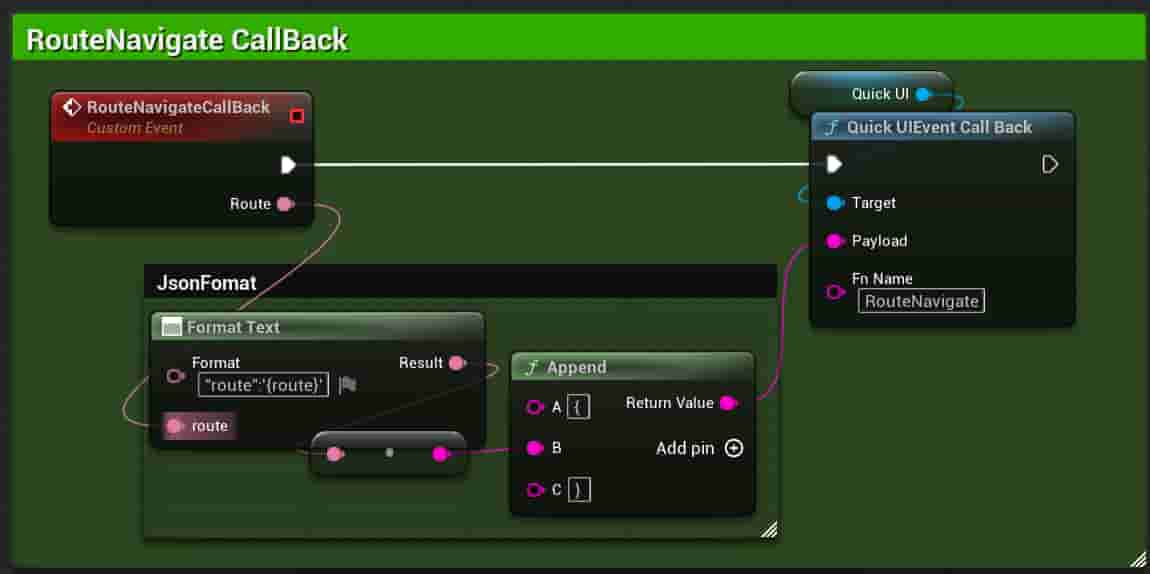
Callback Function Configuration
- Use the
Callbackcomponent to configure event callback functions, returning the UE5 processing results to QuickUI. Payloadis the parameter passed when the event is triggered, in JSON string format.Fn Nameis the function executed when the event is triggered, used to handle event logic, and needs to match the event name in the React component. The image below shows a complete callback function blueprint workflow (event trigger -> callback function execution):
Note:
Payloadmust be passed in JSON string format, otherwise the QuickUI frontend will fail to parse.

QuickUIDesign V1.2.0 adds a multi-route interface switching template, supporting route switching functionality, making it easy to design multi-page switching modes based on routing.
Routing System - QuickUIDesign Documentation- Learn more about the routing system in QuickUIDesign, including multi-route interface switching templates.
Google Drive-Demo Project- Download the Demo Project from Google Drive
Step 2: Set Up QuickUIDesign
Install Node.js Runtime
QuickUIDesign is built on the Node.js ecosystem. You need to install Node.js (which includes the npm package manager) first.
Download & Install Node.js Runtime
- Visit the Node.js official website and download the LTS (Long Term Support) version (18+ or higher)
- Choose the installer matching your operating system (
.msifor Windows,.pkgfor macOS) - Run the installer and follow the default setup
Windows users: Restart your system after installation to ensure Node.js and npm are properly registered in the system PATH environment variable.
Verify Installation Node.js Runtime and npm
Open a terminal and run the following commands to confirm the installation:
Expected output (version numbers may vary):
The version just needs to meet or exceed the minimum requirements above.
Optional: Configure npm Mirror (for China region)
If you are located in mainland China, consider configuring the Taobao mirror for faster downloads:
Update npm (if needed)
If the npm version that came with Node.js is lower than 9, you can update it manually:
Clone from GitHub
Option 1: Clone the QuickUIDesign repository from GitHub to your local machine:
Open a terminal and run the following commands to clone the QuickUIDesign project:
If you don't have Git installed, please download it from the Git official website.
Option 2: Download QuickUIDesign from GitHub to your local machine:
Extract the master.zip file:
Project Structure
After installation, your project should look like this:
Step 3: Development Workflow
Start the Dev Server
This starts a development server with Hot Module Replacement on http://localhost:3000.
Load in UE5
- Open your UE5 project with the QuickUI plugin enabled
- Create or open a Level Blueprint (or Widget Blueprint)
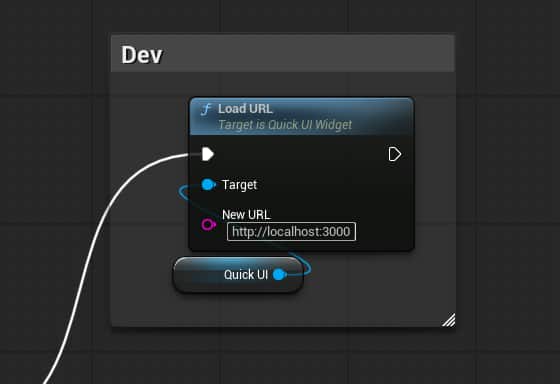
- Use the
LoadURLnode to loadhttp://localhost:3000 - Run the game (Play)
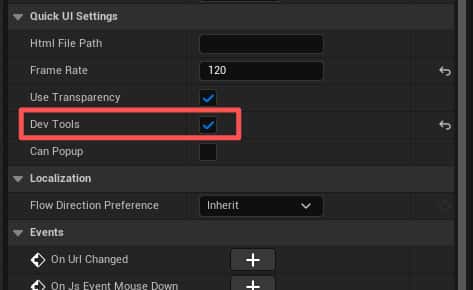
Debug with DevTools
While the game is running:
- Press Ctrl + Shift + I to open the browser DevTools console
- In the console, type
window.ueto verify the UE5 communication object exists - Check for connection status and event logs
Hot Reload
Any changes you make to the source code will be automatically reflected in UE5 without restarting the game — thanks to Rspack's HMR (Hot Module Replacement).
Step 4: Building for Production
When your UI is ready, build it into an optimized single HTML file:
The output will be in dist/merged/index.html — a fully self-contained HTML file with all JS, CSS, and images inlined.
Build Output Explanation
Step 5: Deploy in UE5
Load the Built HTML
- Use the QuickUI Web browser widget in your UE5 project
- Point to the build artifact
dist/merged/index.html - Copy the build artifact to the
Content/html/directory of your UE5 project (this is for illustration; adjust according to your actual project needs) - In the UE5 menu bar, add
Content/html/inEdit → ProjectSettings → Packaging → Advanced → Additional Non-Asset Directories to Package(red box) - In
Packaging → Advanced → Additional Non-Asset Directories to Copy, addContent/html/{Your-MediaFolder}/if non-inline resources are needed (yellow box)

Complete Communication Architecture
Video Tutorial
Download Related
Next Steps
- QuickUIDesign — Detailed template structure and customization
- UE-Connect — Complete API reference for UE5 communication hooks
- FAQ — Common issues and solutions